
Continue reading “Heirloom Tomato & Peach Sandwiches with Creamy Goat Cheese”
plant-forward food | good vibes | all eaters welcome


Yep, this my third grain bowl post this month. Why? Two reasons. First is because I love nourishing bowls of goodness, packed with an array of nutrients, flavors and textures. It’s my favorite way to eat because it’s healthy, convenient, packable, stores well in the fridge and, most importantly, absolutely delish. If you want to make a crave worthy nourish-style bowl, it’s not quite as easy as piling veggies, grains and protein into a bowl. My kind of nourish bowl (aka Buddha Bowl or Grain Bowl) has depth, richness and variety. It takes advantage of seasonal produce, flavor-bombs like garlic and citrus, and requires a tasty sauce or spread to pull it all together. This takes a little bit of time and planning, but it’s worth it. And once all of the components are ready, they’re easy to throw together.
The second reason why I’m focusing on grain bowls is because they’re all the rage these days. Everywhere from fast casual restaurants to fine dining establishments are jumping on the nourish bowl bandwagon. It’s a trend for sure, and food trends, specifically health-supportive ones, are my jam.
So there you have it. One more inspirational nourish bowl to get your creative juices and health vibes flowing. And if you missed the last two, check them out below.
Burrito Nourish Bowls with Roasted Peppers & Tomatillo Sauce
Cauliflower Satay Nourish Bowl

Roasted Summer Veggie Nourish Bowl with Classic Hummus
Serves: 4 Start to Finish: 1 hour Active Time: 30 minutes
Ingredients
For Veggies & Rice
1.5 cups dry brown rice
sea salt, fine grain
2 large zucchinis, cut into a large dice
olive oil
3 large cloves garlic, minced (2 for zucchini, 1 for hummus)
1 pint cherry tomatoes
2 orange bell peppers (red and yellow bell peppers work too)
For Hummus (use storebought if desired)
1 14-oz can chickpeas
3 tablespoons tahini
2 tablespoons fresh lemon juice
1 tablespoon olive oil
3/4 teaspoons sea salt, fine grain
1/2 teaspoon cumin
1/4 teaspoon black pepper
For Assembly
4 cups lightly packed greens (I used red leaf lettuce)
2 teaspoons red wine vinegar (lemon juice works too)
1 red onion, quartered and thinly sliced
3 tablespoons pine nuts, lightly toasted
To Make
Preheat oven to 400 degrees.
Cook 1.5 cups brown rice to package instructions – it goes something like this – rinse rice in colander, add to small sauce pan with 3/4 teaspoon sea salt and 3 cups water. Bring to boil, reduce to simmer, cover with lid. Allow to cook for 35-40 minutes, until water is mostly absorbed. Remove from heat and allow to steam, covered, for 10 minutes.
Toss zucchini cubes with 3/4 teaspoons salt, 2 cloves chopped garlic and 1 tablespoon olive oil. Transfer to a parchment lined baking sheet in a single layer. Toss tomatoes with 2 teaspoons olive oil and 1/4 teaspoon salt. Transfer to baking sheet with zucchini. Cook cherry tomatoes for 20 minutes. Cook zucchini for 30-35 minutes, flipping once through.
Roast the bell peppers. I like to do this over the open flames on my burner, which takes about 8 minutes and another 10 minutes in a sealed paper paper bag or covered bowl. This allows the peppers to steam and makes the charred skins easily peel off. Once charred skin is removed, discard stem and seeds, cut into a large dice. You can also roast the peppers in the over with the other veggies. To do this, remove stem and seeds, dice bell peppers, toss with a little oil and roast for about 25 minutes.
Meanwhile, make hummus. Combine all hummus ingredients plus 5-6 tablespoons water in a food processor or in a hand blender vessel. Use the water to achieve your desired consistency.
To assemble nourish bowls – toss greens with vinegar, sliced red onions and 1/4 teaspoon sea salt. Divide evenly between 4 dishes. Top each bowl with 3/4 cup cooked rice, 1/4 of all roasted vegetables and 3-4 tablespoons hummus. Garnish each serving with 2 teaspoons toasted pine nuts.
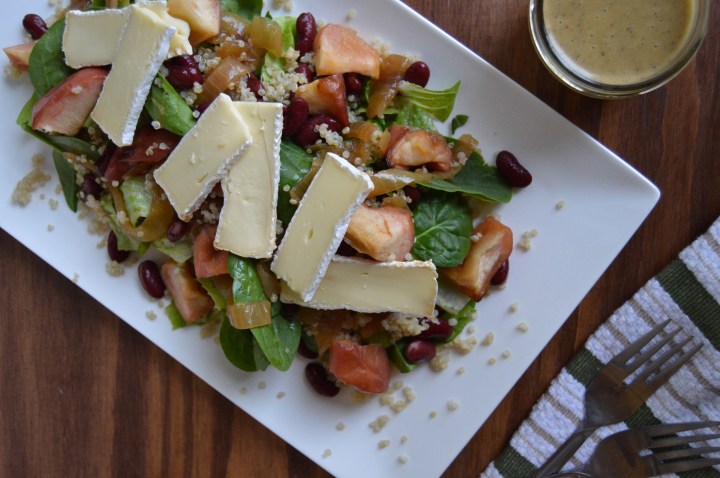
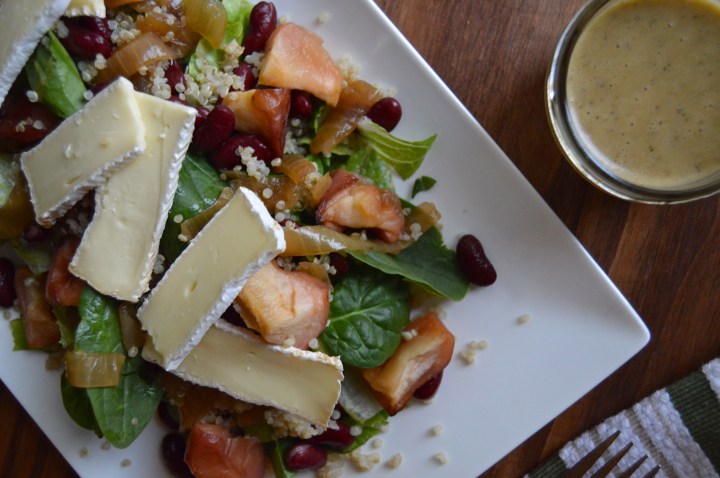
There are salads, and then there are SALADS. I’m talking super yummy, satisfying and healthful salads, filled to the brim with flavor, texture, and nourishment. A salad like this answers the body’s desire for fresh, clean, and nutrient-rich meals, to offset all of the richer and more indulgent meals we (I mean, “I”) enjoy eating. Salads like this are definitely a staple in my diet, and this one is a particular favorite of mine. There’s sweetness from the roasted apples, depth from the caramelized onion, freshness from the greens, richness from the cheese, and a punch of flavor from the delish sherry vinaigrette (my new basic dressing for everything and anything). Trust me when I say, this salad won’t disappoint.

When creating a super satisfying “big salad” (Seinfeld reference), there are a few elements that I almost always include. There’s always something a bit sweet, there’s always something (or a few things) that adds richness and complexity, there’s always a balanced dressing, and there’s always an abundance of protein and fiber. But protein is the focus of this post.
I’ve decided to focus on meat-free protein sources for a few reasons. The first reason is that I get this question a lot, how do you get enough protein as a vegetarian or a vegan? Short answer, easily (sometimes I even eat too much protein by accident). The second reason why I’m focusing on protein today is because my class recently started our nutrition-specific lectures at school (Natural Gourmet Institute), and I’d like to pass on the basics of protein to all my lovely readers. And thirdly because this particular salad highlights almost all of the meat-free protein source categories, so it only makes sense to use it as a reason to talk about meat-free protein. So here we go!
The first question I want to answer is, what does protein do for us? Protein is one of three essential macronutrients required for life and function (the other two are carbs and fat). Protein, as most know, is a building block of muscles and organs in the body (including the brain and liver), and allows for a physically strong and fit body. But protein is also essential for important bodily functions such as metabolism, fighting off infections, and the creation of enzymes and hormones. Additionally, protein is also needed for proper brain function and clear thinking. So basically, protein is super-duper important. But what is protein?
Protein is a source of amino acids for our body. Our bodies require 22 different types amino acids in order to function. 13 of these required amino acids are naturally produced in the body. But 9 of them are not produced by the body, which means these 9 ‘essential amino acids’ (EAA) need to be given to the body through ingestion (aka eating and drinking). Complete protein foods, like meat, poultry, fish, eggs and dairy, include all 9 EAA’s in sufficient quantities (easy enough).Point is, if you eat meat and dairy, it’s simple to get all those essential amino acids. And there are a handful of vegan complete protein options, including quinoa, chia seeds and buckwheat. However, most vegetarian- and vegan-friendly protein sources do not include all 9 EAA’s. We call these ‘incomplete proteins’.
The issue is, as a vegetarian, I can’t eat quinoa all-day-every-day. Don’t get me wrong, I love quinoa, especially in this salad. But variety is the spice of life! No worries though. The cool thing here, is that you can combine incomplete protein sources to create complete proteins. All plants contain protein, therefor all contain amino acids. To get complete proteins, simply combine multiple protein sources. For instance, black beans + brown rice or whole grain bread + almond butter or whole grain pasta + kale & pine nut pesto or millet pilaf with pecans and baby spinach. Basically, grains are combined with veggies and legumes (nuts, seeds, beans), creating whole and complete protein sources.
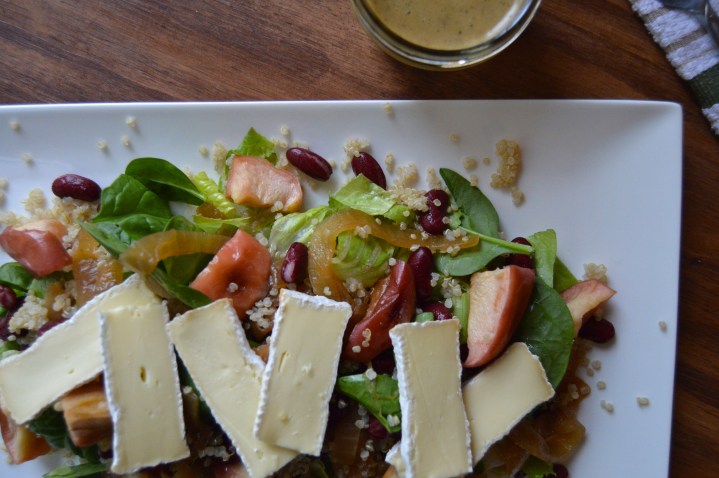
For this particular salad, I used quinoa, so other ingredients weren’t necessary to create complete protein. But I added beans anyway for texture, additional protein and fiber. Then I added even more protein with fresh baby spinach and brie cheese. See? So much protein! All of which are vegetarian, most of which are vegan.
So there you go, a brief summary of protein. To recap, protein is absolutely essential for a healthy and strong body and mind. Meat, fish, poultry, dairy and eggs are complete proteins, providing all essential amino acids in one swoop. Multiple incomplete proteins (most grains, vegetables and legumes) should be combined to create complete proteins. And veggie-friendly protein sources are countless, you just have to know when and how to combine them. And if you’re still wondering where meat-freers get protein, just take a look at this salad. Gang’s all there!
Roasted Apple & Brie Salad with Sherry Vinaigrette Dressing
Serves: 3 mains or 6 sides Start to Finish: 1 hr
Ingredients
For salad
3/4 cup dry quinoa
Sea salt, fine grain
1 large yellow onion, peeled and sliced into 1/4″ slices
1 tablespoon olive oil
2 large apples (like gala or honey crisp)
1 can organic kidney beans (1.5 to 2 cups cooked beans)
3 ounces Brie cheese, thinly sliced
1 large romaine heart, washed and chopped
10 ounces fresh baby spinach, washed
Sherry Vinaigrette Dressing (recipe follows)
For dressing
1/3 cup extra virgin olive oil
3 tablespoons sherry vinegar
2 tablespoons organic maple syrup
1 cloves garlic, peeled and chopped (1 teaspoon chopped garlic)
1.5 teaspoons Dijon mustard
1 teasooon sea salt, fine grain
1/4 teaspoon black pepper
To Make
Add quinoa, 1/2 teaspoon salt and 1.5 cups water to a small saucepan. Bring to boil, reduce to simmer, cover. Cook until quinoa is tender, about 13 minutes. Set aside, still covered, for 5-10 minutes. Transfer to bowl to cool.
Meanwhile, heat 1 tablespoon olive oil over medium heat in sauté pan. Add onions and 1/2 teaspoon salt. Stir frequently to prevent burning. Cook until onions are caramelized, about 45 minutes. Add water to the pan when it gets dry, 3-4 tablespoons at a time. When onions are caramelized and the pan is at a dry phase, remove from heat. Transfer to container for cooling.
While onions cook, remove core and cut apples into big bite-size chunks. Toss with 1 tablespoon olive oil and spread onto parchment lined baking sheet. Roast apples in oven until tender, 25-30 minutes, tossing once during cooking.
Drain and rinse beans. Wash and prep lettuces.
Make dressing. In a blender or using and immersion blender, blend all dressing ingredients until smooth and creamy. Season with sea salt to taste.
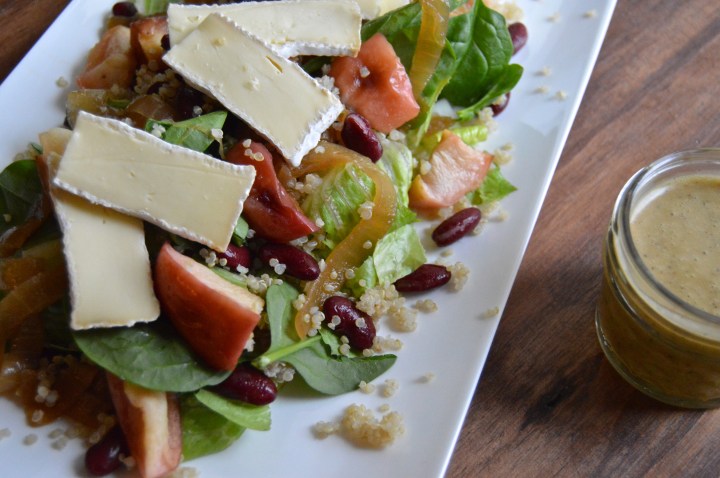
This can be a tossed salad or a composed salad. When all components are ready (quinoa, caramelized onions, roasted apples, beans, Brie cheese and dressing), divide among portions of romaine/spinach and drizzle with dressing to taste. Or toss all components together just before serving. Go easy on the dressing at first, you can always add more or serve more on the side for those who like lots of dressing.
*the components to this salad should be at room temp or chilled before tossing with lettuces.
**double recipe to feed a crowd or to keep around for future dinners and lunches in a pinch.
***sherry vinaigrette, caramelized onions, roasted apples and quinoa can all be made up to 3-4 days in advance. Store each component separately in tightly sealed containers and refrigerate.

Between my best friend’s amazing wedding last weekend (shout out to my girl, Karen G), and keeping myself on top of school as the workload steadily grows, and catching a bug of some kind this week, what better recipe to share than a total time-buster recipe? I mean, I barely had time to make a post this week, but because this recipe is so simple, I managed to pull it together. It must be easy, right?
I think everyone has those weeks when they’re desperate for something quick, easy, satisfying, comforting and delicious. I actually think many people consider this type of week the norm. So basically quick, easy, satisfying, comforting and delicious are always the ideal when it comes to weeknight meals. But that’s a tall order. Ok, now take meat out of the equation. Even taller. But trust me when I say, simple, yummy and vegetarian-friendly cooking is attainable.

The key to satisfying meals, sans meat, is creating depth and complexity by using new and different flavor combos. I get inspiration from everywhere when it comes to finding exciting new tastes. Today’s inspiration comes from a light lunch I made when trying to clean out the kitchen a few weeks back. I topped an English muffin with a fresh sliced pear, fresh mozzarella and a pinch of sea salt. It was love at first bite so I immediately wrote it down on my list of upcoming recipe ideas. And today, pear and mozzarella, will finally have their moment in the spotlight.

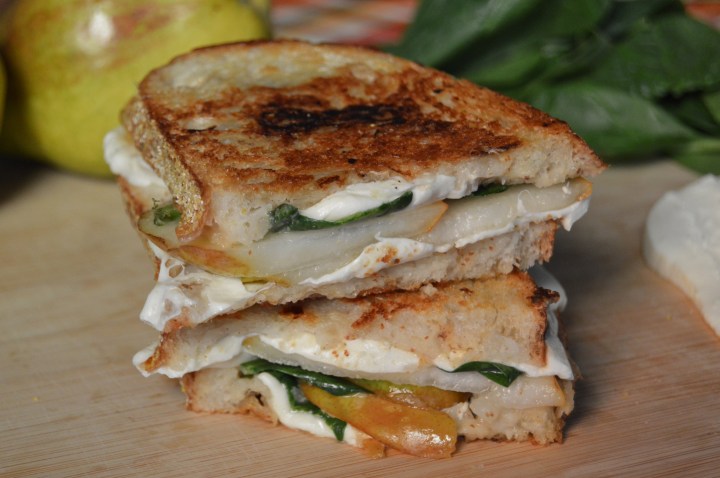
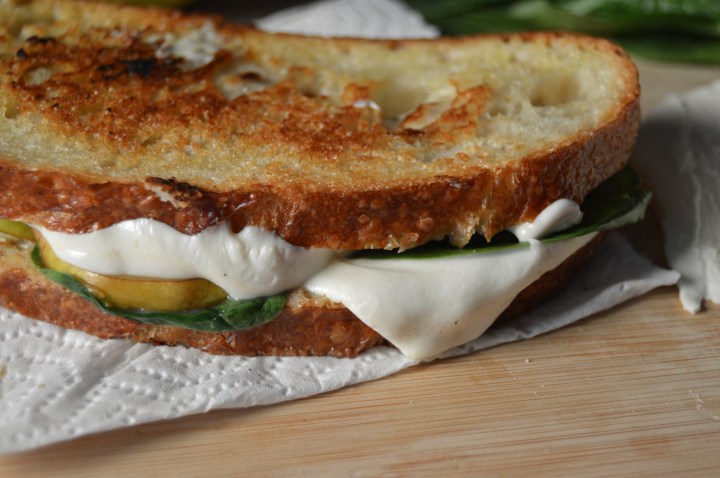
Pear and Mozzarella Grilled Cheeses are the perfect quick and easy dinner for the fall season. This time of year, pears are sweet and juicy, and their vibrant flavor goes perfectly with the creamy, salty profile of fresh mozzarella. I added fresh spinach leaves to pump up the nutritional profile and added a super simple, sweet and tangy sauce to compliment the sweetness in the pears and also to cut through the richness of the cheese. It’s almost like a honey mustard, but uses maple syrup to get that sweetness in addition to the grainy mustard. This 2-ingredient spread was one of the first things I learned at culinary school and I’ve been making it constantly ever since. It’s so basic, I am almost embarrassed to say that I had to learn it. But whatevs, it’s amazing.

Anyway, mozz, pears, fresh spinach and maple mustard sauce. That’s it. Barely any prep work whatsoever. Just some slicing really, because my spinach was already triple washed. Score (I hate washing lettuce). Then I layered the ingredients between two slices of bakery-fresh sourdough bread and brushed the outsides with a bit of oil. Yum!
Now for the grilling portion of the grilled cheese. What I’m about to tell you is my secret for the perfect grilled cheese. It’s hot and gooey on the inside and golden-crisp on the outside. Every. Time. I mean, have you had this problem before? It’s crazy how something as basic as grilled cheese can be so difficult to get right. But I’ve got the magic. First trick is a super low heat. Like basically as low as it can go. And the second trick is to use a lid on your pan. The low heat allows for the sandwich to cook very slowly and the lid traps the heat to surround the sandwich, ensuring the middle will be piping hot and uber melty. I also press the sandwich down every so often with the back of the spatula, an important step for a grilled cheese that contains more than just cheese. If you follow these three steps, I can promise you, you will be absolutely delighted!

So I spilled my deepest, darkest secret to you of how to make grilled cheeses absolutely perfect. And all you want to do now is to go try making a perfectly melty and crispy grilled cheese using this new-found cooking wisdom. And all I have left to say is go for it, good luck and let me know how it goes!
Quick & Easy: Fresh Mozzarella and Pear Grilled Cheese Sandwiches with Maple Mustard
Serves: 4 Start to finish: 20 minutes
Ingredients
8 slices bakery-fresh Sourdough Bread
12 ounces Fresh Mozzarella, sliced*
2 ripe Pears, sliced (I used organic Bartlett Pears)
2 handfuls fresh Baby Spinach Leaves
1\3 cup Whole Grain Mustard
2 tablespoons Maple Syrup
Sea Salt, fine grain
2 tablespoons Olive Oil
To Make
In a small bowl, mix mustard and maple syrup. Set aside.
Slice mozzarella into thin slices. It may be difficult to cut fresh mozzarella thin, do the best you can. Break up slices into 2 parts, this makes it easier to distribute evenly on the sandwich.
Assemble sandwiches. For each sandwich, layer like this…
1 slice bread
Light layer of maple mustard
2 pieces of cheese
Season with a pinch of salt
5 spinach leaves
2-3 slices of pear
2 pieces of cheese
Another slice of bread, spread with maple mustard
When sandwiches are assembled, heat a large skillet over low heat (very low) for about a minute. Meanwhile, brush the top slice of each sandwich with a bit of olive oil. Gently flip sandwiches into the pan, olive oil side down. Cover with a lid and allow to cook for 5-7 minutes, until golden and crispy. Press down on the sandwiches with a spatula every so often. Flip the sandwiches and cook for another 5 minutes, or until the 2nd side is golden and crispy.**
*i allow for 3 ounces of cheese per sandwich. But that’s up to you. Note that 2 ounces is an actual serving size of cheese.
**on your first time using a stovetop, keep an eye on the sandwiches to prevent burning. Once you know how your stove/heat works, you’ll have freedom while they cook to prepare a side dish or something. My stove is 6 minutes per side, with an extra 1 minute on each side at the end (lowest heat).
